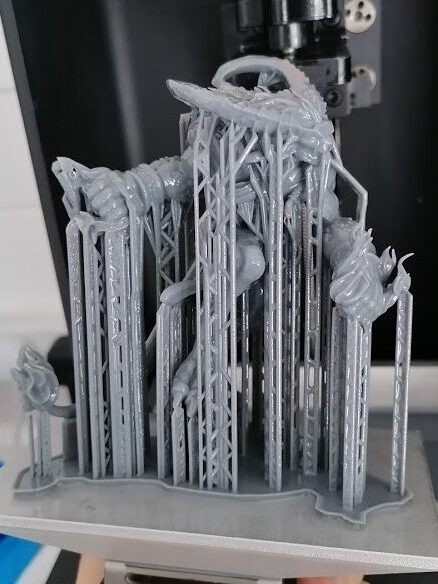
What should I look for in a 3D printer to do miniatures?
Dan KellyShare
Have you been thinking about stepping up your miniature hobby with a new resin printer? Theres a lot to learn about it and as a professional 3D printer since 2016, I'd like to offer a few bits of advice to help keep you afloat in this sea of technology that is 3D printing! I love miniatures and I love painting them, so my primary focus is on producing minis that are superb quality and paint beautifully. As you've found your way here to ready this, my guess is that you share that same sentiment. With that in mind, I will be disregarding FDM technology which simply isn't up to the job of doing miniatures properly due to the layer lines and the amount of post processing you'd need to do to get anywhere near a passable miniature. Even then the quality will be leagues behind even the lowest quality resin printer.
I also need to say that I'm not affiliated with any particular brand of printer, resin etc so my advice here is entirely based on my own knowledge and experience.
Now lets get on to the tips!
1 - Forget about 2k, 4k and 8k - it's all meaningless!
The screen resolution when advertised as 2k, 4k or 8k etc is irrelevant as it all depends upon the build plate size. What you need to look out for is the XY Resolution/Pixel size. The original domestic level resin 3D printers (Anycubic Photon, Elegoo mars etc) had an XY resolution of around 57 Microns (also written as 57um). This was given as a 2K printer with a 5.5" build plate. The Original Elegoo Saturn by contrast had a 4K screen, which you'd think would yield better prints, but with a 10" plate the larger resolution was spread over a larger size leading to a fairly similar 50um XY resolution.
The optimal level for getting the best out of miniatures is 35um or lower. 8k printers like the Phrozen Sonic Mini 8K have a pixel resolution of around 22um, but unless you scrutinise prints under a macro lens and print details that are literally too fine to be painted, all you'll ever need is the 35um resolution - anything lower is just showing off! :-)
2 - Size isn't everything!!
You might be tempted to run out and buy the biggest printer you can get your hands on, but let me offer you a warning first. The learning curve with resin printing is pretty steep - there are a lot of settings to tweak and several ways that you can cause accidental, yet costly damage to your printer. Firstly lets look at the screens.
2a - Replacement Screen Costs
The screens on 3D printers are consumable and so sooner or later you'll need to change it. A new screen for a Sonic Mini 4K as an example is around £95. The Sonic Mighty 8K which is the same resolution but with a 10" build plate comes in at around £235. The sonic Mega 8K which has a pixel resolution of 43um comes in at a whopping £422!
If you damage your screen (which I'll explain later), you'll need to replace it, which means opening up the printer and dealing with some minor electronics such as unplugging and reconnecting electrical ribbons and the like. its all very delicate so you need to be very careful or you could damage your new screen and render it useless before you've even got any use out of it!
2b - Print Fails

Next up we have Print fails (yay!!!) Failed prints are every 3D printer's worst nightmare! theres nothing worse than waiting 10 hours for a big print to finish only to come and check a bed of empty supports and half of the model poking out of the resin vat!
On a larger printer, the larger surface area will be exerting more pull force on the model as the layers separate from the FEP (the film at the bottom of the VAT). This will in turn mean you will need stronger supports, slower lift speeds and any number of other setting tweaks to ensure you get good prints. This means that until you have got the hang of it, you are likely to get a high rate of failures.
Now, the larger print bed also means you may be tempted to put MORE or BIGGER models on there, and that in turn means a larger value of wasted resin with each fail!
2c - FEP

So first off, FEP stands for Fluorinated Ethylene Propylene, and is the film that we find at the bottom of our resin vats. FEP is used becasue is has very low surface friction (aka non-stick), is non-reactive with other chemicals (i.e. the resin), is transparent and resistant to Sunlight (i.e. it won't degrade when exposed to the UV light that we use to cure the resin).
FEP is also a consumable, and every now and then you'll notice prints will fail where they had previously been fine and this may be due to wear on your FEP will require it to be changed.
It goes without saying that buying larger sheets of the material will cost more. 5 sheets of the smaller size come in between £10 and £15, where 5 sheets of the larger sizes can be £20-35.
On a side note, my personal recommendation is to use NFEP - its the same product as FEP but has a smoother surface finish for even lower resin adhesion, so your printing is smoother, doesn't feature that "pang" noise when the print detaches with each layer, and exerts less pull force on your print and supports so it eases the failure rate. It's a little more expensive but they last well and will give you much more peace of mind. If at any point you're advised to "lube your FEP", disregard that advice entirely (adding a ptfe non-stick lubricant to the non-stick film is redundant and adds a chemical element into your resin container that could potentially contaminate your resin and lead to unknown reactions either now or further down the life of the resin). Instead just grab some NFEP!
2d - Bigger = Slower!
As the print bed increases in size, as does the FEP film at the bottom of the vat. At the end of each exposure, the build plate lifts and detaches the print from the FEP. The lift needs to be high enough to account for the stretch in the FEP which is greatest at the centre point (see the diagram below).

As the lift height requirement increases, your print time increases too. At 45mm a minute (a good slow speed for a large print), your vertical movement is just 0.75mm a second. Lets use a lift height of 5mm for the Sonic Mini 4k with 1500 layers on the print. Thats 10mm of movement per layer (5 up and 5 down), so 7.5 seconds of movement per layer, and 11250 seconds of movement on the whole print (187 minutes/3 hours 7 minutes).
Lets increase the lift height just 2 mm to the 7mm recommended height for the Elegoo Saturn or Sonic Mighty. the extra 4mm per layer means that the same print now takes 15750 seconds of movement time, or 262 minutes/4hrs 22 minutes - an hour and 15 minutes longer. its not a problem, just a consideration.
It's not quite that simple of course as we now have retract and lift speeds separately from each other, as well as light off delay and of course layer exposure to account for, but it does illustrate my point.
I bought my first 10" printer thinking I could print more models in the same time not knowing this fact and my prints ended up taking way longer, albeit more models on the plate. Retrospectively I wish I'd just purchased 2 smaller printers instead!
3 - Resin choice
To get the best detail out of a 3D printer, you want a resin that has low shrinkage and high precision as it's primary features. These resins tend to cost a little more (upwards of £40 a litre) Adding additional features such as toughness and flexibility will bump that price even higher until you arrive at something premium (but well worth it) like Ameralabs TGM7 resin. My personal choice for resin is Phrozen Aqua 4K grey - it has great detail retention and low shrinkage and a good amount of flexibility when cured. That said, despite it being a water washable resin, I do still clean it with IPA, and it performs perfectly for me. It doesn't perform great if the ambient temperature drops below about 18C, so I tend to keep the office heated to around 21-23C whilst I have prints running.
My Recommendation
My personal recommendation for a resin 3D printer to print miniatures that are high enough detail to be able to paint up to competition standards is the Phrozen Sonic Mini 4K. It strikes the balance between build quality, reliability, availability and print quality. If you're really pinched for budget, you can get the same print quality cheaper with something like the Elegoo Mars 3, however you will need to tinker more and there are more areas where fails can occur due to the build plate design and the levelling techniques involved.
Pair this printer with the Phrozen Aqua Grey 4K resin for super crisp, sharp prints with a perfect amount of flexibility for everyday handling. If you don't mind spending a little more on the resin and are the kind of gamer that likes to invest a lot of time and effort into your painting, then you should absolutely consider upgrading your resin to Ameralabs TGM7. There is really nothing else like it on the market in terms of flexibility and the detail retention on it is fantastic. I tested this resin when it was in development and printed off our Female Elf Assassin mini in it. I threw her across the room against the wall every day for 3 months before it finally broke! Trust me when I say you'll never need to be concerned about the models falling over or dropping off the table if you're using this stuff!

1 comment
What would be your printer recommendation now as the Mini 4k seems to be difficult to get hold of now?